Installing Acquia Drupal on IIS using the Web Platform Installer
Introduction
In the following walkthrough we will step through the installation of Acquia Drupal using the Web Platform Installer.
Installation
1. Launch the Web Platform Installer either from IIS Manager or Start > All Programs > Microsoft Web Platform Installer.
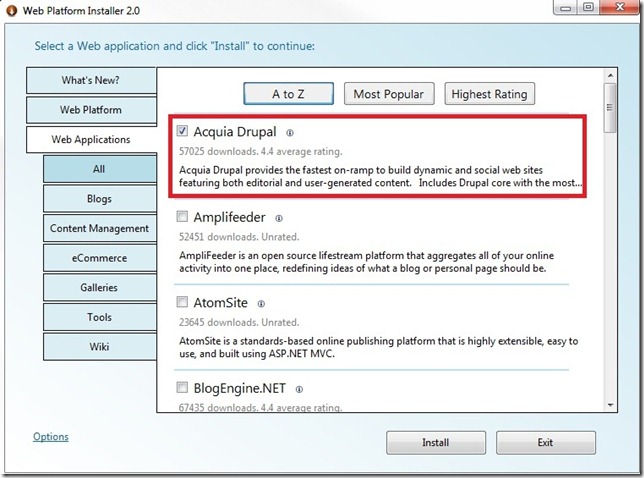
2. Click the Web Applications tab and the select Acquia Drupal . Click Install.
3. On the license Screen the following dependencies will be picked up , or omitted if you already have the feature installed. . The versions listed are current for the time the blog was drafted and are subject to change.
Dependencies.
- Url Rewrite 1.1
- MySQL Connector/Net 5.2
- Php 5.2.12
Optional
- Windows Cache Extension for Php 5.2
- MySQL Windows Essential 5.1
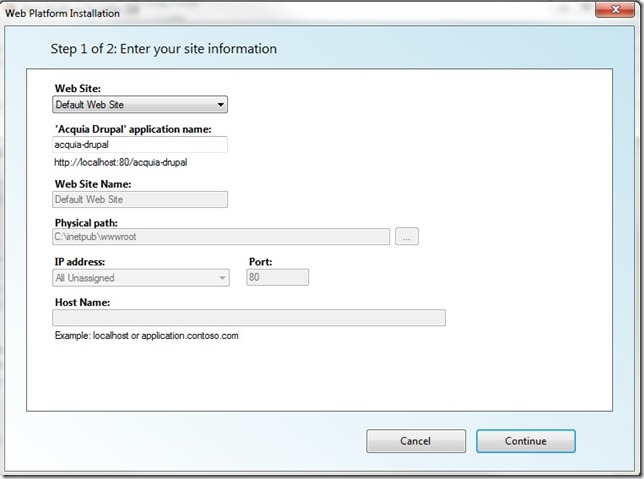
4. Step 1 of 2: Enter your site Information.The next screen “Enter your site information” is where you will enter information about how you want to set up Acquia Drupal in IIS.
In the first option Web Site: you can choose any existing website such as “Default Web Site” or New Web Site.Depending on which option is chosen the following options will be available.
Choose an existing Website
- Acquia Drupal application name: This can be left at the default “acquia-drupal” or enter a new name.
New Web Site
- Acquia Drupal application name: Default “/” : The slash indicates the root of the website you are about to create.This can be left at default here since the application is already isolated by a different website.
- Web Site Name: Accept the Default “acquia-drupal” or enter a new name .
- Physical Path : Defines the physical Path of the web site in IIS and which is where the acquia-drupal application files are installed.
NOTE : The following 3 parameters make up the bindings for the IIS site. When creating additional sites one of these three parameters needs to be different than the default web site( or other existing sites). For example the Default Web Site is configured for All Unassigned IP’s and the default Port 80. In this configuration you would need to either change the Port or create a host header.
- IP Address: Choose an IP address from the list or leave at all unassigned if you are going to use a unique port or Host name for the site..
- Port: Default 80. Leave at default or changed to desired port.
- Host Name : Enter a host name if you are differentiating by host headers.
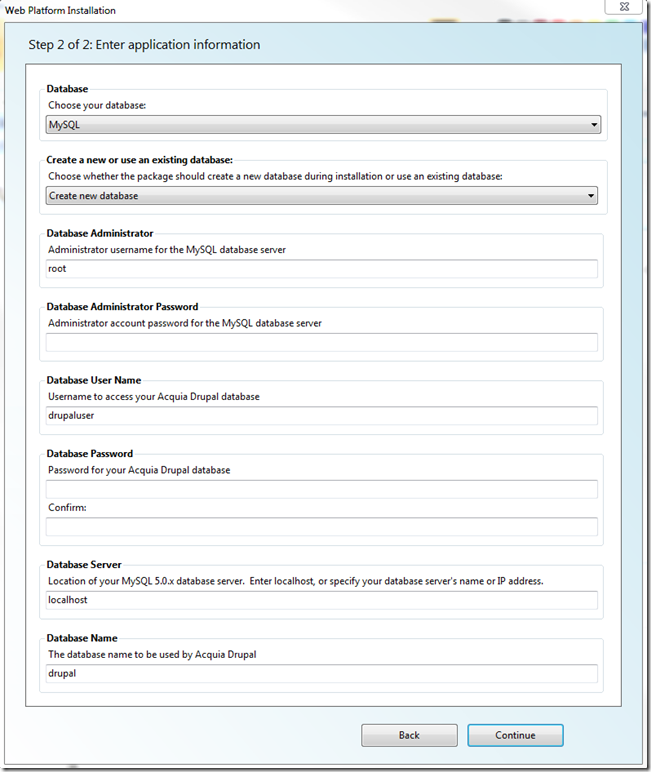
5.On the Enter Application information screen you will enter application information for Acquia Drupal including Database information, application passwords .
- Database : Choose your database : This cannot be changed and is set to MYSQL.
- Create New database /Use an Existing database: If installing Acquia Drupal for the first time you will leave this at Create New Database. If using an existing database you will need to provide the Database User name and password that was created in previous installation.
- Database Administrator : This defaults to “root” which is the default Admin account for MySQL. If you configured MySQL with another Admin account name, enter that here.
- Database Administrator Password: Password for the account configured in the previous field.
- Database User Name : Default “drupaluser” This can be configured to any name you wish. If you are connecting to an Existing Database you will use the name you configured in the first installation.
- Database Password + Confirm: This is the password you will create for the account named in the previous field( i.e. drupaluser)
- Database Server : Use Localhost for local MySQL installations.
- Database Name : Default Drupal . This is the database name that will be added to your mySQL instance, you can accept the default or enter a new name.
6.When the installation is complete the following will be presented . Click on Launch Acquia Drupal to test the installation.
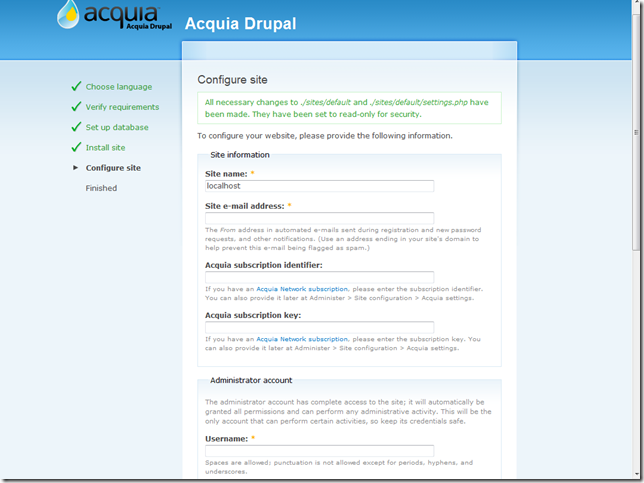
7. When you launch the site it will use the following address if you installed under the default web site: http://localhost/acquia-drupal/install.php . Then after completing some initialization task the browser will have this address: http://localhost/acquia-drupal/install.php?locale=&profile=acquia and you should see the following page. You are now ready to work with your Acquia Drupal application. For information regarding the application, documentation can be found here. http://acquia.com/documentation.


