Using IIS Manager accounts for Web Deployment Tool (msdeploy) delegation
This blog outlines the basic steps for setting up IIS Manager accounts so that they may be used for Web Deployment Tool delegation.
Most of the steps particular to using IIS Manager users for delegation are required for connecting remotely using the Windows Management service, so if there are already accounts set up for remote management, that work has already been done.
The following steps will allow IIS Manager accounts to be used for management service delegation. Step-by-step instructions with screen shots may be found for steps 1 through 4 on this page, with their section title added in parenthesis: http://learn.iis.net/page.aspx/159/configuring-remote-administration-and-feature-delegation-in-iis-70/
1. Make sure that Windows Management Service is installed (Configuring Remote Connections in IIS Manager)
2. Enable remote connections for IIS users (Enable Remote Connections and Configure Identity Credentials)
The previous steps only need to be performed once, however the following steps may be repeated for any number of new IIS Manager users.
3. Create an IIS Manager account (Add an IIS Manager User)
4. Give the user access to a site or application (Configure IIS Manager Permissions for a Site or an Application)
This next step is vital for remote management, without which IIS users could not access or modify content for a site/application. A complete walkthrough for this step is the main focus of this page.
5. Grant access to the physical site/application content (Configure Access Control Lists (ACLs) for Content Directories)
- Open IIS Manager (from start menu type “inetmgr” and press ENTER)
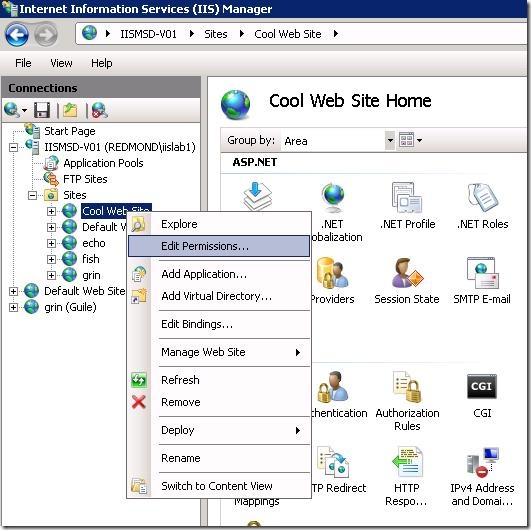
- Select the site (or application) you want to give an IIS user access to, right-click, and select the “Edit Permissions…” option.
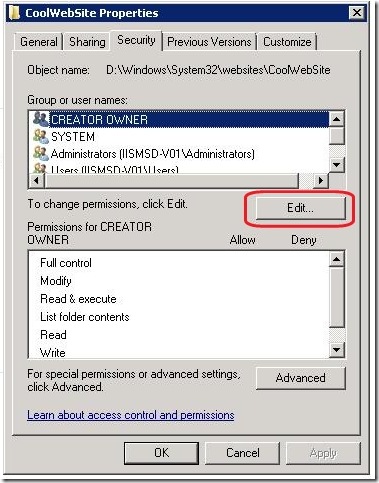
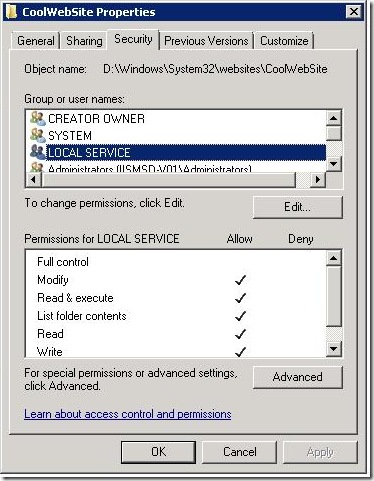
- Go to the Security tab and click “Edit…” under the “Group or user names:” section.
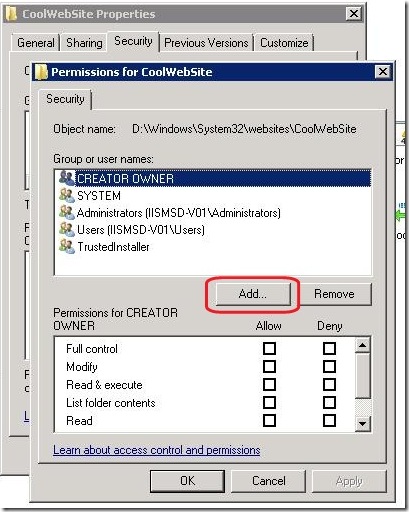
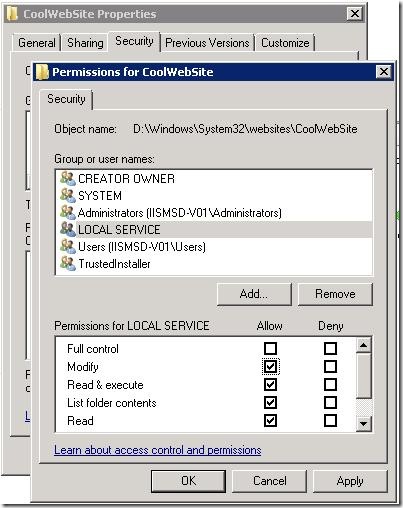
- This will open a very similar looking Permissions window. Click the “Add…” button.
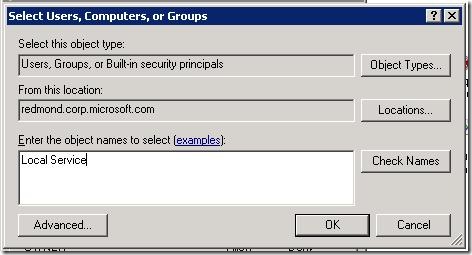
- Now type in the WMSvc identity in the Select Users, Computers, or Groups dialog (i.e. “Local Service” - without the quotation marks. To confirm that this is the account WMSvc uses, check out the section, below, “How to find out what account to add for IIS user ACLs”). Click OK.
- Select the LOCAL SERVICE user and modify the Permissions for LOCAL SERVICE by checking/unchecking the permission boxes. For example, you may want to allow Write or Modify permissions.
- When finished editing the permissions, click OK. You may be warned that “You are about to change the permission settings on system folders…” depending on where the directory for your web site is located.
- Now you will see LOCAL SERVICE in the list of “Group or user names:” and can view the permissions by selecting that account. If at any point you want to change these permissions, you can follow similar steps by clicking Edit and then changing the check-box permission selections.
- Click OK when you are finished.
6. Add the IIS user to existing/new Management Service Delegation rules to allow those users to import content, create applications, and/or modify databases
How to find out what account to add for IIS user ACLs
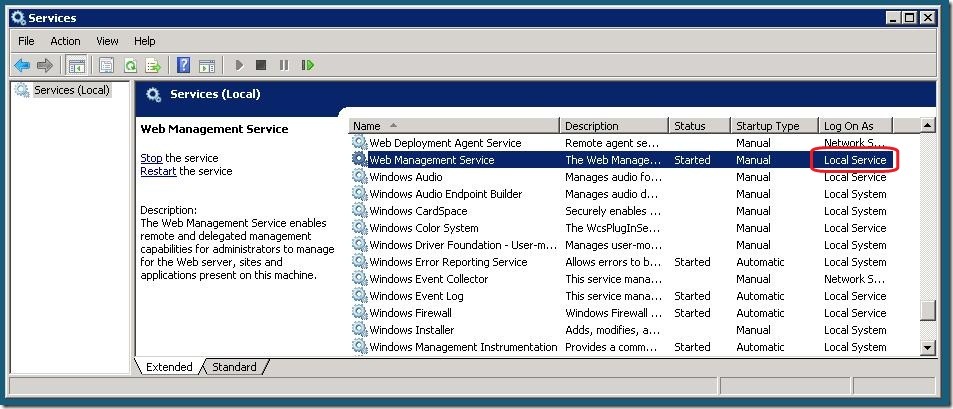
This will typically be “Local Service”, and it is easy to check this.
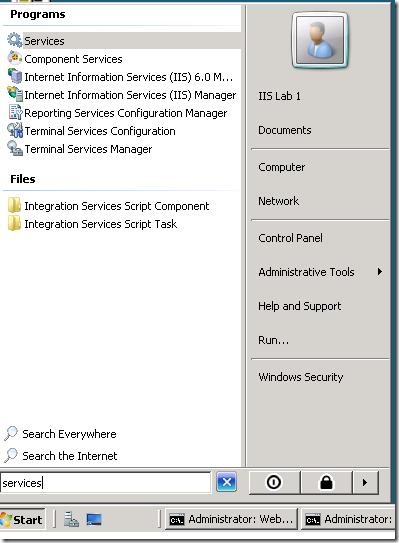
Click Start and type “Services” – open the Services feature.
In Services, locate the service named “Web Management Service” and see what is listed under the Log On As column.
